If you want to build strength and muscle in the gym, you generally need to do one kind of training and use one particular tool, like a barbell or dumbbell or kettlebell. If you think about boosting your metabolism, you generally use a very different tool, like a treadmill or a rower.
But every so often, you stumble onto a training tool that lets you do both things at the same time. And the weight sled is one of those special tools (which is partly why it’s becoming increasingly common in today’s gyms).
Also known as a “prowler,” the sled is a pretty simple tool. It’s a large sled that you can easily load with weight, and it’s meant to slide across turf (another thing I’m seeing more often in gyms). There are several versions of the sled. Perhaps the most common one you’ll see includes two posts for handles (which can also be loaded with weight).

However the sled is structured, your use for it is generally relatively simple: You pull or push it from one point to another. It’s a simple enough act, right? But done correctly and for long enough, it’ll challenge a boatload of muscles, making you stronger and doing much, much more than that, too.
What You’re Working
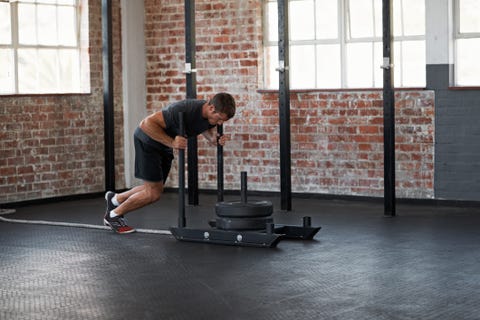
The most basic sled push engages a host of muscles. To do a basic sled push, you face the sled, and grasp its handles. Then lean forward slightly. Maintain tension in your back muscles as you do this, and aim to maintain a neutral spine. You don’t want to round your back, but you also don’t want to overarch it, either.
From there, you drive the sled forward, either with arms extended or arms bent (more on that later. Either way, to push the sled forward, you’ll have to really drive with your hamstrings and glutes. Meanwhile, your core will be working overtime, too. Your core will be responsible for transferring all that power from your hamstrings and glutes (and your calves too!) through your torso and into your arms and into the sled. That means your abs, spinal extensors, and obliques will have to put in serious work.
View this post on Instagram
A post shared by David Otey, CSCS PN1 (@davidscottpt) on
Your upper back muscles will also engage, too, working to keep your upper back straight. That’s lat, trap and rhomboid work. And if you’re doing this with straight arms, you may feel your triceps and deltoid muscles turning on, too.
That’s a lot of bang for buck out of one training tool. And that’s why it’s worth giving sled training a try.
Your Arm Position
Varying your arm position when doing basic sled pushes can make it an even more versatile training tool, but there’s a way to do that. When you first begin doing sled pushes, keep your arms close to your body, letting your elbows bend. That will help build resilient spinal integrity and hone your posture.
Over the course of several weeks, you can straighten your arms, extending them forward and away from your torso. This is a more vulnerable body position, though, so do it with care. You’ll hit your shoulders and upper torso stabilizing muscles more, and you’ll fire up your core more too. Just like a bridge, the longer the distance between fixed points, the more the middle has to work. Holding a weight with arms extended will amplify your spinal erectors, scapular involvement, and anterior core.
Sleds Offer Training Versatility
The sled is a way to load locomotive and running mechanics in front of the body rather than on top of the body. This is a major advantage to the sled that trainers commonly overlook. Exercises like military presses, or explosive moves like power cleans and snatches load you from overhead, placing the compressive forces of gravity and whatever weight you’re lifting on your muscles, bone structure (and, most detrimentally sometimes, your spine).

kupicooGetty Images
That doesn’t happen with the sled; the load never weights you down. This allows for a ton of training variability. You can aim to do power bursts, tapping into EPOC (excess post-exercise oxygen consumption), which can help you burn fat and calories. You can also do high-intensity steady-state work for conditioning, training your heart and lungs. Or you can do lower-body strength moves.
Whether hypertrophy, fat loss, conditioning, or functionality, the sled can fit into your program. As mentioned earlier, this thing can move. You don’t need a rack, turf strip, or a performance facility. You just need some weight to load on and some space to move it.
Can’t Train Legs? You Can Do This
One of the most common issues we run into with some traditional leg exercises like squats is that spinal compression I mentioned earlier. When weight is loaded at the shoulders of above, the compressive forces translate through the discs in the spine, which can amplify back issues that may already be there. The sled is a strong quadriceps-builder that minimizes those compressive forces, leading to very little stress on the spine.
Knee flexion is always a consideration, too, with leg exercises, especially if you aren’t going to full depth on a squat, either because you haven’t had enough training or because you’re dealing with some pain. The sled, however, might be a better option for you, letting you train with the heavy weights you want to use when squatting more easily, since the weight isn’t piled on your vertically.
From a mental perspective, that can be a daunting task to place a challenge on the body and affirm yourself that you can do it. The sled eliminates that fear factor strictly by design.
Advanced Sled Work
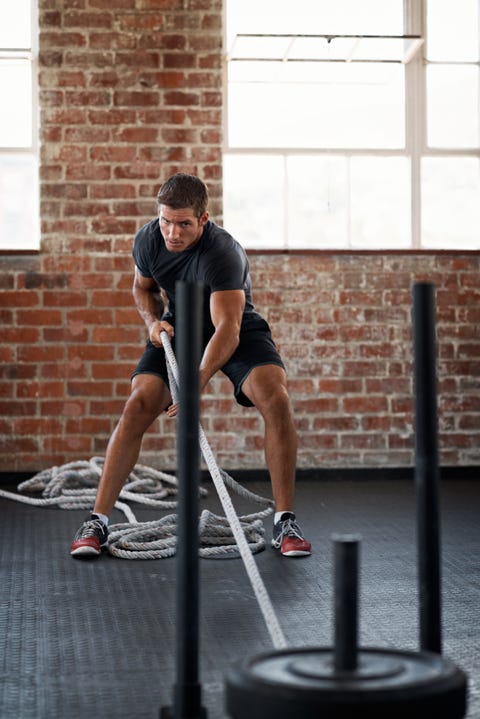
The basic sled push hits your whole body, but you can do far more with the sled than that, too. Attach a rope to the sled, and it becomes a valuable upper-body training tool, especially for hitting your back muscles. You can also pull it from plank position, as in this workout, shredding your core and building back strength.
There are plenty of other options for using the sled to train upper-body, too.
One unique thing about sled training for your upper body is how it changes the contractions. Free weights and most weight machines force your muscles to deliver two kinds of contractions, the concentric, which occurs when your muscles flexes and lifts the weight up, and the eccentric, which happens as you lower a weight to the ground. Thanks to the absence of gravity, the sled has you generally training only concentric contractions; this can make each “rep” easier, but let you pile up more reps.
View this post on Instagram
This one is, um, tough sledding? Did not feel like weights yesterday so worked a pull session with alternative equipment. For each move, pull the sled to you, push the sled back, rest 90 seconds, then go again. Be flexible with the resistance too, because it will vary based on where you’re using the sled and the length of the battle rope. 1) plank single-arm pull: this one is brutal on your lats and your core. Your plank form WILL break but that’s OK. Do your best to maintain it. Hit 3 sets per arm, and you’re best off alternating arms. This’ll jack up your heart rate nicely. 2) prone two-arm sled pull: you can go heavier on this one. You’re getting a ton of lat activation on each pull, plus some tricep work when you finish each pull. 3) half-kneeling two-arm row: key here is to find a good half kneeling stance. Think of this as two moves per pull, not one: a hip hinge to pick up the rope and start, then lock in that strong, safe torso position, then finish with a really powerful row pull. Hit 6 sets on this since you’ve halved the distance and you want both knees to get a chance in that forward position. 4) lying biceps curl pull: for guns. Keep your upper arms glued to the floor the whole time. Do 4-6 sets of this, then hit 4 sets of cable squat curls to finish things out. Then go home. #fitness #training #backday #sledsplusbattleropes #battleropes #biceps
A post shared by Eb Samuel (@ebenezersamuel23) on
Your Three Sled Workouts
Ready to hit the sled? Try these three workouts.
The Classic Strength Workout
Building strength with the sled can be a great way to add some variety to your stale leg routine. Begin with basic sled pushes, pushing the sled 20 meters each time. Do four sets, and use a weight equal to your one-rep squat max weight. Rest 2 minutes between each set.
How to: Leaning forward at a 45-degree angle you will grip the sled with your hands close to your chest (similar to a push-up position). From a staggered stance, drive through the balls of your feet with all toes in contact with the ground. Take large steps forward with each step.
The Upper-Body Power Workout
The TRX power row is another great way to use the sled and test your full-body power potential, too. You will be explosively extending the knees and hips while driving the elbows back into a fluid motion to pull the weight with as much force as possible. This is a great option to test your back while minimizing low back stress.
Pull the sled 20 meters at a time. Do 4 sets, resting 2 minutes between each.
How to: With the TRX connected to the sled, sit back into a squat position with a tall posture and arms fully extended in front. You should have full tension of the TRX when sitting back into the squat. In one fluid move, explode up and back, extending the hips and knees while pulling the sled directly towards your torso. Once completed, step backwards until the TRX again has tension, then repeat.
The Sled Conditioning Gauntlet

kupicooGetty Images
Building strength with the sled can be a great way to add some variety to your stale leg routine. Instead of pulling 20 meters, you’ll pull the sled 50 meters in this workout. (Don’t have room? Just pull the sled 20 meters two-and-a-half times.) Use fifty percent of your squat weight one-rep max. Moving this much weight at a consistent pace will challenge your muscular endurance and the bodies ability to clearout some of the byproducts of muscular demand such as lactic acid.
How to: Leaning forward at a 45-degree angle you will grip the sled with your hands close to your chest (similar to a push up position). From a staggered stance, drive through the balls of your feet with all toes in contact with the ground. Try to make each step large.
Source: Read Full Article
